
Wildfires can cause a lot of damage. They affect our homes and our appliances, too. After a wildfire, we often forget about the harm done to our refrigerators. Smoke from wildfires carries soot and ash, which can seep into our homes. This can harm our refrigerators, making them work less efficiently and possibly leading to expensive repairs. In this guide, we will discuss some DIY tips in troubleshooting refrigerator issues after wildfires. It’s crucial to address any problems promptly to ensure your fridge continues to work effectively and avoid any potential safety hazards. By following these tips, you can potentially save yourself from costly repairs and extend the lifespan of your refrigerator. Let’s delve into some practical solutions to keep your appliance running smoothly even after being exposed to the aftermath of a wildfire.
Identifying Common Refrigerator Issues Post-Wildfire
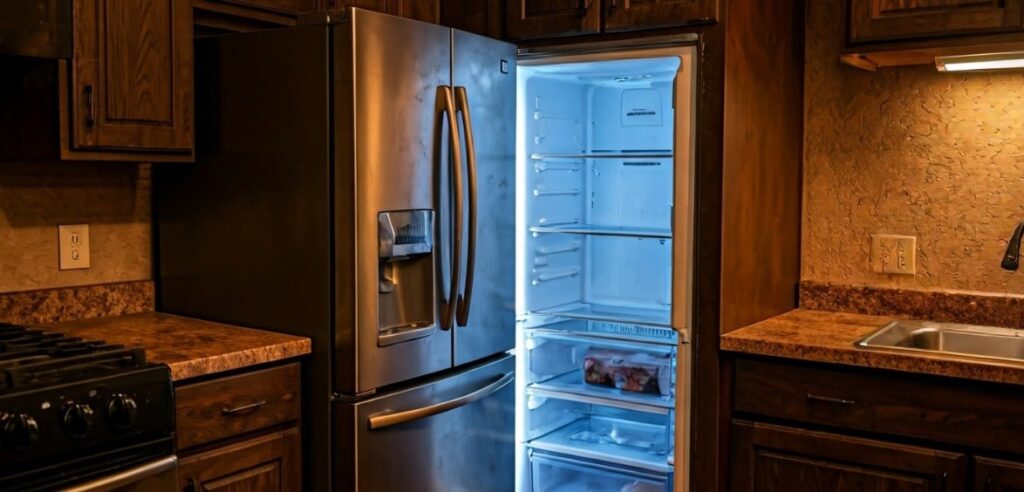
In the time after a wildfire, refrigerators usually get damage from smoke and soot. This can cause several problems. These issues can make your appliance work poorly and may be dangerous to your health if you do not fix them. Knowing the common refrigerator problems after a wildfire is the first step to solving them and making repairs.
When you check your refrigerator, look closely for signs of clogged airways and any harm to the gaskets. These are two common problems from wildfire debris. Knowing how they affect your fridge can help you take the right DIY steps to fix them.
Signs of Clogged Airways Leading to Ice Formation
One common issue you may face is clogged airways. During a wildfire, tiny soot and ash particles can enter your home. They might even get into your refrigerator. These particles can block the air vents. This can disrupt the airflow needed to keep the right temperature.
You can tell there is a problem if you see too much ice forming in the freezer or fridge. When the airflow is blocked, the cooling system has to work harder. This can make the temperature drop too much, causing freezing. In severe cases, it can completely block the airways. If that happens, your sub-zero refrigerator might not work well.
To prevent these problems, it’s important to check and clean the air vents regularly, especially after a wildfire. This will help keep your refrigerator running properly.
Gasket Damage and Its Impact on Refrigeration Efficiency
Another important thing to check is the refrigerator gasket. This rubber seal helps keep cold air inside and stops warm air from getting in. Wildfire smoke can hurt the gasket, making it brittle, cracked, or warped.
A damaged gasket affects how well your fridge works. It makes the fridge use more energy to stay cold, which can wear it out faster.
It is very important to look at the gasket for any damage, like tears or cracks. If you find any problems, replacing the gasket is easy to do yourself. This can help your fridge work better and last longer.
Step-by-Step Guide for Unclogging Air Vents
Clogged air vents often happen after wildfire damage. The good news is, you can fix them yourself. Keeping the airflow clear is important. It helps your refrigerator work better and can stop it from breaking down. It also makes it last longer.
To clean the air vents the right way, follow a clear plan. First, collect all the tools and materials you will need so the job goes smoothly.
Tools and Materials Needed for DIY Cleaning
Before you start cleaning your refrigerator’s air vents, it is important to gather all the tools and materials you need. Having everything ready will make your job easier and help you clean well. Here is what you will need:
- Vacuum cleaner with a crevice attachment: This will be your main tool for getting rid of loose dust and debris from the vents.
- Soft-bristled brush: A small brush with soft bristles will help you remove any stubborn particles stuck to the vents.
- Warm soapy water: Mix warm water with a little dish soap. You will use this to wipe down the vents and get rid of any leftover residue.
- Clean cloths or paper towels: Have some clean cloths or paper towels ready for drying the vents after you clean them.
- Optional: Cotton swabs: Cotton swabs can help get into tight spots in the vents.
Detailed Cleaning Process to Restore Airflow
Once you have your tools and materials ready, follow these steps to unclog your refrigerator’s air vents. This will help restore airflow to your sub-zero fridge:
- Unplug your refrigerator: This is very important for safety since you will be near electrical parts.
- Find the air vents: The vents’ location can change based on your fridge model. Look at your user manual if you are unsure.
- Vacuum the vents: Use the crevice tool on your vacuum cleaner to take out dust, dirt, and anything else you can see inside the vents. Be careful and gentle to avoid harming the vents.
- Scrub with soapy water: Get a soft brush, dip it into warm soapy water, and scrub the vents gently to remove any leftover particles. Pay close attention to corners where dirt gathers.
- Wipe with a clean cloth: Take a clean, damp cloth and wipe down the vents to remove any soapy leftovers.
- Dry thoroughly: Make sure the vents are fully dry before you plug your fridge back in. You can use a dry cloth or paper towels for this.
Cleaning your refrigerator’s air vents regularly, especially after a wildfire, will greatly improve its efficiency and lifespan.
Replacing Damaged Gaskets: A DIY Approach
Replacing a broken refrigerator gasket is a simple task you can do yourself. This job can help your appliance run better. When the gasket is damaged, it can’t hold the cold air inside. This makes your refrigerator work harder. As a result, it wastes energy, raises your electricity bills, and can wear out the appliance faster.
The good news is that changing a refrigerator gasket is easy, and you only need a few tools and some time. By doing it yourself, you can save money on expensive repairs and help your refrigerator last longer.
Determining When a Gasket Needs Replacement
Before you decide to replace your refrigerator gasket, it’s important to check if it really needs replacing. Wildfire damage can speed up wear and tear, but there are clear signs that show when a new gasket is necessary.
Here are some signs that your refrigerator gasket needs help:
- Visual Inspection: Look closely at the gasket for any damage, including cracks, tears, or bending. Focus on the corners since they can wear out faster.
- The “Dollar Bill Test”: Close the door of the fridge on a dollar bill. If you can pull the bill out easily, it means the seal is not good. This shows that you may need to replace the gasket. Do this test in different spots around the gasket to see if the problem is consistent.
- Condensation: If you see too much moisture on the outside of the fridge or inside the fridge area, it could mean there’s an air leak. This is often due to a faulty gasket.
If you notice any of these signs, getting a new gasket is a smart choice. It can help you save money on energy costs and make your fridge last longer.
Instructions for Removing and Installing New Gaskets
Replacing a refrigerator gasket is a manageable DIY project that can be achieved by following these detailed steps:
|
Step |
Instruction |
|
1. Purchase the Correct Gasket: |
Measure your refrigerator door to determine the correct gasket size. Order a replacement gasket that matches your refrigerator’s make and model for a perfect fit. |
|
2. Prepare for Installation: |
Unplug your refrigerator from the power outlet. This step is crucial for safety and prevents electrical shock during the process. |
|
3. Remove the Old Gasket: |
Starting from a corner, carefully peel back the old gasket. You may encounter some resistance, so use a putty knife to loosen the gasket if needed. Be sure to remove all traces of the old gasket and any adhesive residue. |
|
4. Install the New Gasket: |
Begin by aligning the new gasket with the door frame, ensuring it sits flush against the edge. Press firmly along the gasket’s length to secure it in place. Use a hairdryer to warm the gasket slightly, making it more pliable and easier to install. |
|
5. Test the Seal: |
Once the gasket is in place, close the refrigerator door and inspect the seal. Ensure the gasket is properly seated and there are no gaps or bulges. Perform the “dollar bill test” again to verify a tight seal. |
By following these steps, you can successfully replace your refrigerator gasket, restoring its efficiency and preventing further energy waste.
Conclusion
It’s important to learn essential tips in troubleshooting refrigerator issues after wildfires to ensure your appliance is working well. Problems like blocked air vents and broken gaskets can make it work less efficiently. You can fix these issues by using our DIY guide. It shows you how to unblock air vents and change broken gaskets. Taking care of your fridge after a wildfire can help avoid more damage later. If you want more tips on fixing fridge problems, look at our blog on Decoding Different Refrigerator Sounds and Signals. Keep your appliance safe for continued use and your peace of mind.
Frequently Asked Questions
How do I know if my Sub Zero refrigerator’s airways are clogged?
Signs that your Sub Zero fridge has clogged airways are easy to spot. You might see too much ice in the freezer. The fridge may not cool well and the back could feel very warm. If you observe any of these signs, you should check and clean the air vents.
Can I replace a refrigerator gasket by myself?
Replacing a refrigerator gasket is something you can do yourself. If you have the right size gasket and some patience, it’s easy to take out the old one and put in a new one. This can help your refrigerator work better and save you money on service calls.
What are the signs of gasket damage in a refrigerator?
Signs that your gasket is damaged are visible cracks, tears, or warping. A quick test you can try is closing the door on a dollar bill. If you can pull the bill out easily, the gasket probably needs to be replaced.
How often should I check my refrigerator for issues after a wildfire?
After a wildfire, you should check your refrigerator right away for any damage or signs of smoke. After that, look at it every three months for a year. Then, include it in your regular appliance care routine.
Can cleaning the air vents improve my refrigerator’s efficiency?
Cleaning the air vents can really help your refrigerator work better. When vents get clogged, air cannot flow freely. This makes the appliance work harder than it needs to. By keeping the vents clean, you ensure good air circulation and better cooling.